
Easy Peach Jam

Easy Peach Jam Recipe
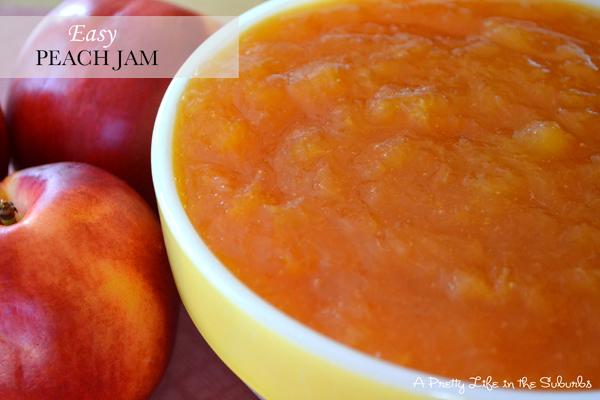
Make this Easy Peach Jam Recipe with only 3 simple ingredients! This small batch jam requires no pectin or canning.
If you’re looking for a recipe for fresh summer peaches, this fresh peach jam is it! You can have this small batch jam ready in no time at all. Delicious on toast, biscuits, with yogurt, on vanilla ice cream and more!
Peaches = Summer
If peaches don’t scream summer I don’t know what does. When the farmers’ market is full of peaches, I buy boxes of them. We love peach anything. Peach Crisp, Peach Pie, Peach Pancakes, and especially Peach Jam. Homemade Peach Jam is so easy to make. Especially this small batch jam because you don’t have to go through all the trouble of canning, you can just make this batch and keep the jam in your fridge. My kind of jam!

Simple. Gorgeous. Scrumptious! And rich with peach flavour. Better than any peach jam in grocery stores.


Peach Jam Recipe Tips:
- PEACHES: Use ripe fresh peaches, not too over ripe, but soft and ready to eat. The skins come off a lot easier.
- BLANCHING: If the skins don’t easily come off of the peaches you should blanch the peaches. I show you how to do this below.
- STORAGE: Because this batch of this jam is so small (~ 2 cups), and because this jam can be refrigerated for up to 4 weeks you don’t really need to seal the jars. It’s really just more of a hassle because 4 weeks is plenty of time to finish this jam.

FAQs
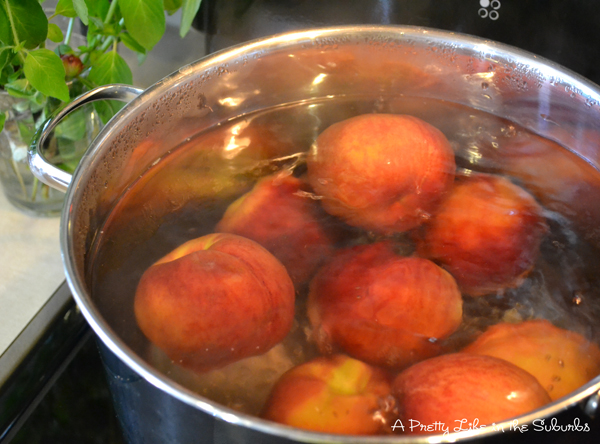
How to Blanch Peaches:
- Blanching is the easiest way to remove the skins from peaches. You don’t have to do this step if you can remove the peach skins easily as they are. Often ripe peach skins come off very easily, but if they don’t, blanching makes it very easy.
- Place the peaches into a large pot of boiling water, for 1 minute. No longer.
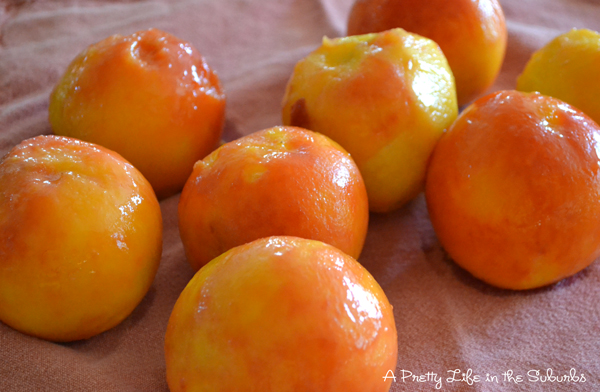
- Then use a slotted spoon to remove the peaches from the boiling water, and immediately place them into a cold water bath, for 1 minute. No longer. Do not soak them.
- The skins should just peel off.
- Now peel off the peach skins.
How to make peach jam:
- Once the skins have been removed, remove the pits from the peeled peaches.
- Now slice the peaches.
- Place the peach slices, lemon zest and lemon juice into a large pot or skillet.
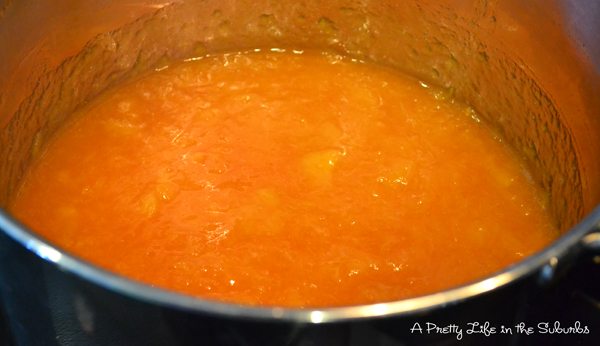
- Over low-medium heat cook the mixture for about 15 minutes, until the peaches are soft, and the juices are released.
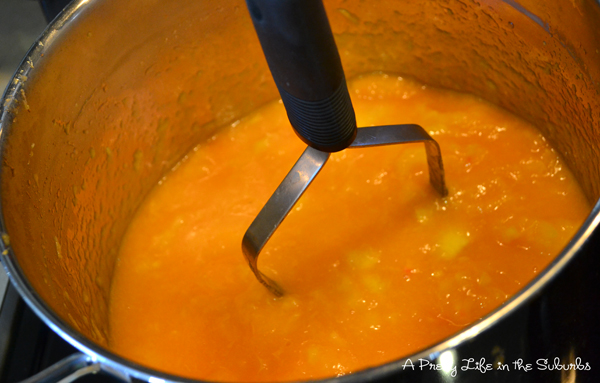
- As the peaches soften, stir frequently, and use your spoon or a potato masher to break them down.
- At this point add the sugar, and stir until dissolved.
- On medium-high heat, bring the mixture to a boil, cook for 5 minutes, stirring continuously.
- After the 5 minutes, reduce the heat to low-medium (don’t boil the jam, just slow cooking), for another 40 – 60 minutes. You will know that the jam is ready when the mixture is thick enough to leave a trail behind the spoon. NOTE: the jam will also thicken as it cools, so be careful not to overcook it.
- Remove from heat, and let cool.
- Add to a clean jar with a lid.
- Keep in the refrigerator for up to 4 weeks.


Easy Peach Jam Recipe
Ingredients
- 2 lbs fresh ripe peaches about 8
- 2 tsp lemon zest optional
- 2 tbsp lemon juice
- 2 cups granulated sugar
Instructions
First, blanch the peaches to remove the skins:
- See images above for guidance. Also, you don’t have to do this step if you can remove the peach skins easily as they are. Often ripe peach skins come off very easily. You can use a paring knife to help.
- Put your peaches into a pot of boiling water, for 1 minute. No longer.
- Then remove from the boiling water, and immediately put them into a cold water bath, for 1 minute. No longer. Do not soak them.
- The skins should just peel off.
- Peel off the skins.
Making the jam:
- Once the skins have been removed, take out the pits, and slice the peaches.
- Place the peach slices, lemon zest and lemon juice into a large pot or skillet.
- Over medium-low heat cook for about 15 minutes, until the peaches are soft, and the juices are released.
- As the peaches soften, stir frequently, and use your spoon or a potato masher to break them down.
- At this point, add the sugar, and stir until dissolved.
- On medium-high heat, bring the mixture to a boil, cook for 5 minutes, stirring continuously.
- After the 5 minutes, reduce the heat to low-medium (don’t boil the jam, just slow cooking), for another 40 – 60 minutes. You will know that the jam is ready when the mixture is thick enough to leave a trail behind the spoon. NOTE: the jam will also thicken as it cools, so be careful not to overcook it.
- Remove from heat, and let cool.
- Add to a jar with a lid and refrigerate.
More homemade jam:

More Peach Recipes
Salads, cakes, pies, desserts and more!


Have a delicious day!


Oh this looks so good-and easy! Win win 🙂 Homemade jam is the absolute best. Great pictures too Jo-Anna!
Yum! Farmer’s Market, here I come! Oh, goodness that rhymes…
Hi. Was very easy to do. Instructions were easy. Enjoyed it. Will make again.
I’m so happy you enjoyed it Helen!
Thanks for the recipes. My husband was shipped some Georgia peaches for his birthday. They area ripening faster than he can eat them. Now I know what to do with them!
Thanks for the recipes. My husband was shipped some Georgia peaches for his birthday. They area ripening faster than he can eat them. Now I know what to do with them!
This looks delicious, and so easy to make! Beautiful pictures!
Just wanted to stop by and say Hello. I may not comment on each post, but I am reading them. Stay cool! Don’t forget the peach ice cream!
Thank you Charlotte! I’m so very happy you read along, and so glad you left a comment – I appreciate them so much!
Have a great day!
Jo-Anna
Can’t wait to try this! Question: How long will the jam last for – and should I store it in the fridge or cabinet? Thanks!
Hi Lydia! The jam should last for a couple of weeks as long as you keep it in the fridge.
Hi Charlotte,
Years ago I had a really successful recipe for microwave jelly. It made small batches (less than 2 quarts if I remember and cannot be doubled) but there was no stirring over a hot pot when it’s 100+ degrees here in Sacramento. Unfortunately I’ve lost it. Do you know of this? It was originally from Sunset but they’re not as responsive as they once were
looks delicious Ana and great pics too !
That looks absolutely amazing! But what I am in awe of is your photography! You have a wonderful eye!
blessings,
karianne
This does sound pretty easy. I wonder if I could do this same process with apricots? I like that it only makes a small amount – perfect for only two people!!!
I would definitely try this with apricots! I bet it would be fantastic…now I’m thinking I’m going to have to make some! 😉
Yum!!!
Dumb question…what’s a “heavy bottom” pan??
Not dumb at all! I really just should have said a regular sauce pan! tee hee
Just tried your recipe and it’s lovely. I had to make a slight variation as I had too little fruit for the whole amount, and a little too much for half – my fruit to sugar ratio is a bit higher. I had some on a scone with cream and it’s very good.
I’m so happy you enjoyed this recipe Maddy!
A heavy bottom pan is one with a thick bottom, not the cheap aluminium or steel ones where the bottom is no thicker than the sides of the pan. My pots are steel, but the bottom is a sandwich of steel, copper and aluminium. You get better heat control and you can simmer more easily. If you tried this recipe in a thin metal pan, it would burn.
I found that when I was stirring the peaches, they burnt at the bottom… I mean if I added water it would it dilute the flavour, how can I prevent burning next time?
You can add a little water, it shouldn’t dilute the flavour too much. I would also have the heat on really low though if you find that it is burning…and make sure to stir constantly near the end as the peaches jam up.