
Our Powder Room Makeover!
We’ve been in our house for just over 5 years now, and since we’ve been in it we haven’t done much to it. It was a new house when we moved in, but now it’s getting to a point where some things need replaced and repainted. It’s kind of overwhelming when you look at every room and fixture, and think it needs redone. So we are tackling one room at a time. Ok, well maybe 2 at a time slowly. Right now we are working on getting our Master Bedroom done, and just recently we tackled our powder room.
– – – – –
When we were at my sisters for Easter, I saw her newly redone bathroom and almost fell over. It’s so gorgeous! And there is no coincidence that our newly redone Powder Room may be a similar colour… What I really loved most about her bathroom was that she had replaced the mirror with a gorgeous framed one. So I went on a mission to find just the right mirror – one that we could do the whole room around. And I found one at HomeSense! Score! Once I had this mirror, I could see a vision…
– – – – –
So here we go…here’s our ‘Before’ bathroom:
– – – – –

– – – – –
Our ‘Before’ bathroom was very plain. Nice, but no personality for us. It was painted the same colour as the rest of the house, and had the same terrible light fixtures as all the other bathrooms. Of all the things I hate most about our home it’s all the lights. The bathroom lights are the worst. They are rusty and just not our style. At. All. Time to go!
– – – – –
– – – – –
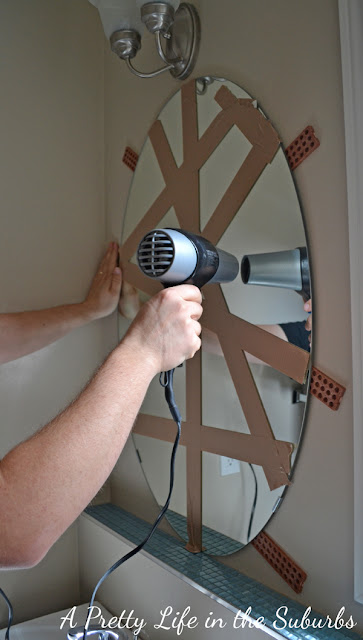
But now, how to get the builder mirror off? My sis had warned us that this was going to be hard – these mirrors are superglued to the drywall! So how to get it off without ripping a giant hole in the drywall? Well my hubby did some research and there seemed to be a common theme…heat the mirror so the glue becomes softened.
– – – – –
How we removed the builder mirror:
- What you will need: Blow dryer, duct tape, shims
- One thing to note: Removing the mirror will likely not leave you with an unblemished wall. This didn’t really matter to us because we knew we were just going to be covering the same spot with a new mirror. Our goal was just to get the mirror off without ripping the drywall or putting a hole in it.
- Stabilize the mirror with duct tape. This part is very important! You have to tape the mirror so that in the event the mirror breaks as you pry it from the wall, you don’t have glass fly everywhere. See the picture above.
- Insert the shims around the mirror as pictured above. They help to slowly pry the mirror from the wall. We just used plastic shims we bought at Home Depot.
- Get out your blow dryer and aim it at your mirror! You have to do this long enough to get the glue softened. It took us about 15-20 minutes.
- When the mirror is ready to come off you will know. Just slowly pull it from the wall. We were left with some glue on the dry wall, but no holes! I didn’t care what it really looked like behind, because I knew we were just going to be covering it with a new mirror. We just scraped off the remaining glue and sanded the wall to make it smooth.
– – – – –

– – – – –
One thing we had done to the bathroom a couple of years ago, was tile the ledge that runs along the wall under the mirror and the window. We used an ice blue glass tile that helped us determine our wall colour. So next we painted.
– – – – –
We used Behr Sonata in eggshell: 530E-3
– – – – –

– – – – –
This colour is funny because it looks SO different it different lighting.
Sometimes it looks very blue and other times it’s very grey looking. I love it!
Sometimes it looks very blue and other times it’s very grey looking. I love it!
– – – – –

Next we hung a new light! Hallelujah!
These lights are from the Martha Stewart Living Seal Harbor Collection from Home Depot.
– – – – –
– – – – –
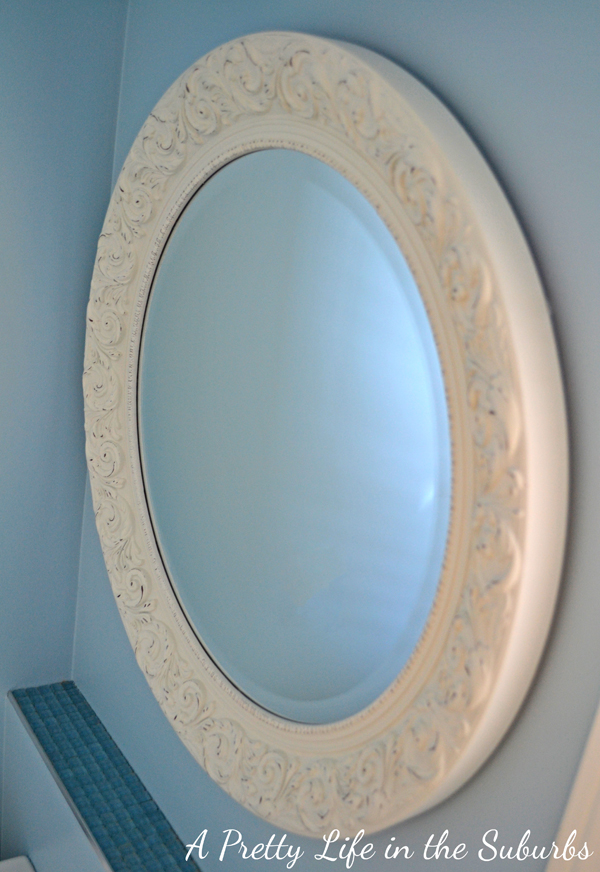
Now for the best part…the mirror!
I found this beautiful mirror at Home Sense – it’s exactly what I wanted!
I love white, I love the weathered look of it, and I love that it is round!
It fits perfectly!
– – – – –

– – – – –
Love this mirror!
– – – – –
– – – – –
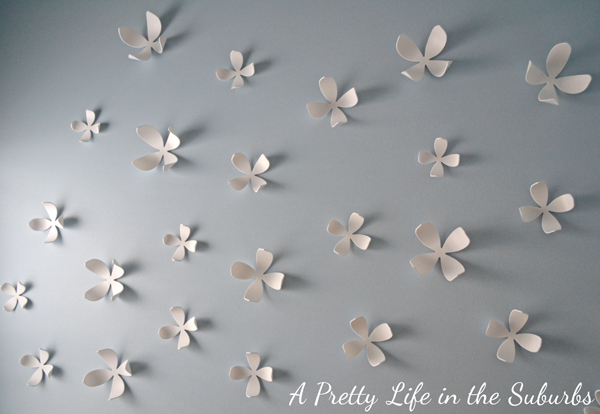
Then we re-stuck these Umbra white molded wall flowers.
They add a nice touch to the room. Girly. Like me. I am girly. I admit it. Finally.
(look how grey the wall looks here…crazy colour)
– – – – –
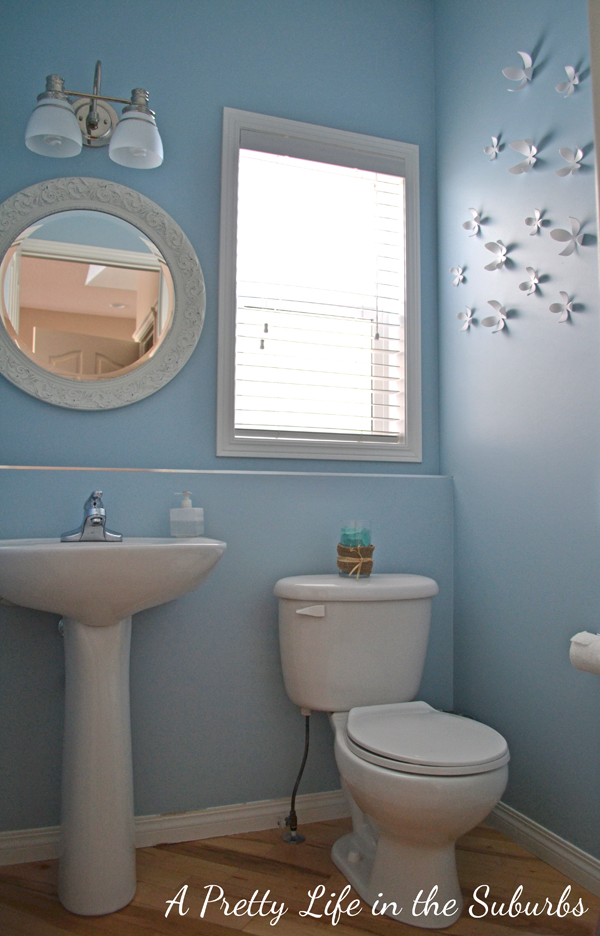
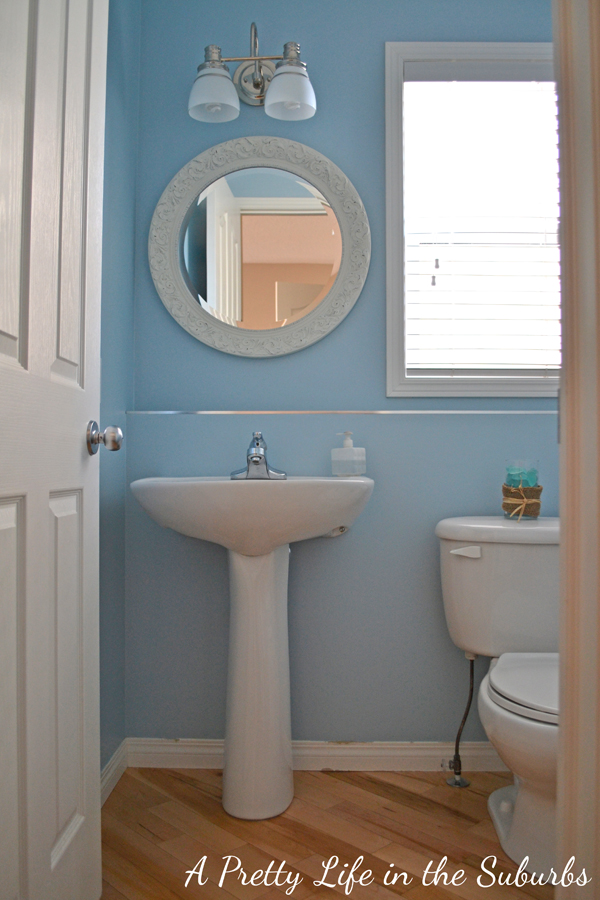
Here is our bathroom ‘After’:
– – – – –
– – – – –
I love, love how it turned out!
It’s fresh, cheery and has my 2 favourite colours: white and blue!
– – – – –
– – – – –
It feels brand new!
And the best part is that it only took us one afternoon to transform it!
I love the power of paint!
– – – – –
So there you go.
A one-afternoon bathroom transformation!
We are so happy with it! I could sit in there all day.
Time to paint something else…I’m hooked on the power of paint!
– – – – –
Thanks for reading!


It’s absolutely gorgeous!
Wanna come do mine?
It is amazing how such small changes make such a big difference! Love it!
Beautiful!!!! Perfect color & mirror! And I love those flowers too (I’m girly too).
I love it its so soft looking!
love the colour.
Cheryl Thornton, Ontario
Thank you Cheryl!
Beautiful job!! That mirror is perfect! Megan
So fresh and pretty! love it!
Lovely! That blue shade is so nice & relaxing. And I love your mirror, great score!!
So happy for you, it’s beautiful!